Showing posts with label Beauty. Show all posts

Thursday, February 27, 2014

Dark Circles (dun dun dun...)

As an Italian woman, I feel that my dark circles are become more like black holes under my eyes. And worse--with age, I find them harder to cover up. If you read my recent beauty post, you know I have tried to tackle the root of the problem with Eye Hope in a Bottle by Philosophy (which is amazing by the way), but my results are not seen overnight. 

See what I mean!?

So, I have been trying to find a concealer that can truly disguise my dark circles. I was in search of a miracle, honestly. I needed the thickest, most life changing concealer that could make my under eyes appear bright, light, and well rested. On this hunt, I have tried a variety of concealers, then even more highlighters trying to find a solution. Now, I know it isn't concealer, foundation, powder, or even highlighter I needed, it was RED LIP LINER!

That's right beauties, red lip liner. My favorite beauty consultant at my local Ulta store, John, taught me the trick--and I can't wait to share. John, if you are reading this, you are fabulous!!! This is a great tip that I just couldn't keep to my dark eyed self. Women, this is a must try!!! He explained that the dark circles are really a hue of blue, which can be a combination of your blood and really thin skin. The reason I could not find this amazing life-changing concealer to cover this up is because concealers are skin colored. Using the red lip liner and a concealer (exactly the color of your skin) you can apply the mixture to combat the blue hue. Voila you have a dark circle corrector!

Let's begin by when to use this little trick in your makeup routine. After my primer, and right before my full face foundation I use this mixture in a half moon shape under my eyes. {Note: this is unlike my concealer that I apply in a triangle shape down the base of my nose. Keep this just on the dark circle areas--for me, that also includes the inside of my eyes, as seen in the pictures}. Once this genius mixture is ready, I cover with foundation, then concealer and continue with my regular makeup routine.

Step 1: Choose a creamy red lip liner. I am using Too Faces Perfect Lip in Perfect Red. Simply because John recommended it because of its consistency.


Step 2: Add some concealer. This is a darker color than my other concealer to help balance my skin tone. I am using Amazing Concealer by Amazing Cosmetics in Ivory. My everyday concealer is Bare Minerals Light 2. Then, mix them together with a concealer brush. Mine is from Bare Minerals


Step 4: Apply all over the dark circle areas in a half-moon shape. You can see how pink this looks! It has instantly taken away that blue black color.


Step 5: Cover with foundation and concealer.  Viola!


Here is the AFTER!

// Floral Blouse here // Pink Top H&M old similar here // Lips MAC Candy Yum Yum topped with I'm Passionate // Nails Essie Marshmallow //

Is this not the perfect way to Polish off your look!?
PLEASE PLEASE PLEASE let me know if you try this tip. I am now on day 3 and have really seen a difference, especially in my photographs. 

Thanks for stopping by!
--Kelsey

Instagram: @KelseyMKipp and @Courtney_m_B

Thursday, February 13, 2014

CLARISONIC Miracles!!!

OMG like OHHH M GEEE--If you have been living under a rock or haven't heard about Clarisonic, let me blow your mind {deep breaths, ladies-it is a life changer}. 

Before I get ahead of myself, I need to explain why this is SO important. Courtney and I built the Polished brand on the idea that we believe people need to appear Polished from head to toe. Let's be real--we have all seen a GORGEOUS looking women walking down the street in sweat pants and carrying a Coach bag. Just to be clear-not Polished. Remember, it's all about the details, skincare cannot be ignored. 

Why, you ask? Healthy skin is something spotted from across the room! When your skin looks tight, clean, fresh, and it glows! If a healthy complexion doesn't sway you, think about your makeup. Does it ever get flaky or refuse to last the day? HELLO--it's not your makeup, it's what is underneath it! So, in order to appear Polished (with fresh stunning makeup) you need to pay a bit of attention to your skin. 

With this in mind, I needed to do some research--Now, strictly business I treated myself to my first facial (research!). I learned A LOT! In case you care, my skin is combination... meaning I have average skin but spots of dry areas. Immediately I knew those spots because I can see the difference when I put on my foundation. These "trouble spots" result from lack of moisturizing. Honestly, this was frustrating to hear. I am great pretty good about taking off my makeup at night, quick wash, and ALWAYS lather on the Aveeno. Well, no more ladies! 

Finally, let the Clarisonic tribute continue. Research and logic aside, after my first use, I saw instant improvements with my skin. My dry spots are minimized and my skin appears so clean and fresh. It's a look I struggle to describe because clean doesn't truly express the difference. It's a must try! Although it is pricey, it's a must!! Trust me :)

My {New} Skincare Routine:
  1. Using a makeup wipe, I remove my makeup on my eyes and face. 
  2. Add a dab of face wash onto the brush. SIDE NOTE: You can use any face wash you wish, but be sure it does not have any exfoliation beads within it. 
  3. Run it under water.
  4. Now, it's time to wash. Best part-Clarisonic Mia 2 has it timed perfectly for you!! When you start the machine, it you feel the pause and hear the buzz it signals you to move to the next area on your face. PS I use the brush that came with the kit. 
  5. Start on your forehead for 20 seconds. Wait for the pause, then move to your nose and chin for 20 seconds. Finally, 10 seconds on each cheek. AND DONE!
  6. STOP after that. This is designed to give the perfect amount of clean. Just enough to get rid of the dirt, grime, and pollution, but not too much that could potentially harm your skin. 
  7. Now, it's time to moisturize! I start with a serum {Time in a Bottle by Philosophy} and then a moisturizer {MAC}. 
**I am loving my serum and moisturizer, but I would love to hear what else you readers are using. Any suggestions?! You know me, always looking for the next best thing. 

OK-time to go out and buy your Clarisonic, you will not be sorry! Please share your thoughts and experiences!!!

Thanks for stopping by,
Kelsey 

Follow us on Instagram @KelseyMKipp and @Courtney_m_B

Thursday, January 30, 2014

Just Wing It


Name an eyeliner trend and I have worn it! Bottom line only, yep. Top lash line only, definitely. Both lines, uh huh. Smudged eyeliner, sure did. Thick white eye liner, hey, I was in 7th grade once, okay. I have experimented with pencil liners, liquid liners, powder liners, colored liners, gel liners, and just about anything they offer in terms of eye lining tools/products. 

I don't tend to do a dramatic eye makeup look very often. I am proud to admit that I love my eyes (ladies, let's all just appreciate what we were given, there's nothing vain about that). The shape, size, and color (thanks, Mom!). So, I try to play up the feature and not do too much. Because of this, I always tend to revert to a simpler and more subtle eye liner. One thing I do know is that I have officially given up on pencil/stick eye liner. These liners go on too thick and I can't get the precision that I want. But, I would keep going back expecting it to be different! Isn't that the definition of insanity? Anyhow, I am more of a brush and powder/gel kind of gal. 

Lately, I have been hooked on cream/gel liners and a winged eye. Something about this eye look is classic, but trendy...totally Polished. People often ask me how I achieve this look without looking costume-y. The truth is, practice. I am no artist, trustttttt me! My drawing/painting abilities have been far surpassed by my 1st grade students (for real). Using a gel liner and a brush is literally like painting. So, what do you do when you're not good at something? Do something else, keep on keeping on and practice!

The tools/products are also important. I find that an angled brush makes the job 123483% easier. A cream or gel liner as opposed to a powder is also my go to because it glides much like paint. 

I use an elf brush and cream liner. I am not one to spend a lot of money on makeup. The bargain shopper in me just can't do it! The total for these products is a whopping $6. Haha, yes, S-I-X dollars. And let me tell you, I swear by these products (which I buy at Target, of course)! The brush works perfectly and is long lasting. The cream eyeliner is smooth, rich in pigment (there is nothing worse than having to keep retracing a perfectly done line for more color, that's a disaster waiting to happen, for me at least),  long lasting, and it doesn't run or smudge (Hallelujah, AMEN).


Find your perfect products here!

elf Angled Brush (I use this)
elf Cream Eyeliner (and this)


Coat all sides of the brush with cream liner, remove excess for a smoother, finer line.


Start at your upper lash line where your inner lashes begin, draw a fine line across.


Start in the middle of your upper lash line and begin to draw a line upward and extend past the outer lashes.


I like the look of a gradual wing. I accomplish this by creating a thicker line toward the outside of my lashes. Make sure it's a continuous line, it should look like one stroke outward and upward.


Voila!


Notice the gradual increase in width.
A simple eye, brows and a statement lip is my new favorite face look.


Thank you for reading! What eye-lining tips and secrets are you keeping?

XO-Courtney

For more makeup looks check us out on Instagram - Courtney_m_b & KelseyMKipp


Thursday, January 23, 2014

Too Faced {Mascara}

Although I am not one for a New Years Resolution, I love the idea of changing up your boring routine. You know the ones on auto pilot. How often do you run out of a beauty product and simply pick up a refill, of the same product you have been using for years? Not me--I am always looking for hot new items that are made for trendy girls who want to Polish off their look.

Here is what I found--Better Than False Lashes! Promise!

The Too Faced Product has 2 tubes of mascara. The gold tube is step 1 & 3--start and finish with the actual mascara. The white tube is step 2--extensions in a bottle.

No matter what mascara you use, ladies, don't skimp on this step. CURL YOUR LASHES! You can pick up an eye lash curler anywhere!

Hopefully, your eye lashes are curled and ready for step 1. Apply Step 1 (gold tube). Bonus? The wand it angled. First, I like to tilt the brush up {pictured} and wiggle into the base of my lashes. Once my lashes are coated, I turn the angled brush around and apply a layer on the BACK of my lashes. Yes--the part you can see when my eyes are closed.

Step 2-the extensions. Hope you can see the little white fibers on my upper eye lashes. I only apply this to my upper lashes because when both were coated, they stuck together a bit when I blinked! 


After you repeat with the gold tube (step 3), here is the difference! I have to admit the pictures do no do it justice!! It's simply amazing in person--you must try it!


Before...
After!


Top here for $9 // Earrings and Belt Francesca's Collections // Link Bracelet Target and Diamond Bracelet Brina Box // Denim Express // Booties Nine West // Mascara here // Lips Mac Rebel //

When eyelash extensions first made their debut, I was thrilled! After a little research, my excitement dissipated... For girls who like low maintenance (like don't curl or wear mascara daily) it's a PERFECT solution! For me, not so much-- I wear a lot some eye makeup, so I don't want to be worried about my investment off my face. Thankfully, I stumbled upon this Too Faced Mascara! 

Voluminous, lengthy and thick lashes? Who wouldn't love that! Let me know what you think!

--Kelsey

Follow us on Instagram @KelseyMKipp and @Courtney_m_B

Thursday, January 16, 2014

Is Your Nail Polish Working Hard Enough?


Mine is doing two jobs! While taking my weekly stroll through Target (don't even act like you don't do this, too, Target is the best, and we all know it), I was wandering around the nail polish looking for a Bordeaux red color. This seems to be my favorite beauty color trend of the winter, so of course I needed to find the perfect nail polish. This tiny little bottle with the cute little cap caught my eye a (I am drawn to unique packaging). Wouldn't you know, the color is called Bordeaux. FATE. Wouldn't you also know that Target had a Cartwheel coupon for this brand of nail polish? DOUBLE FATE. 

It gets better. While reading InStyle, I discovered that Revlon's Parfumerie nail polishes are scented. Yes, scented. So, this adorable, little, perfectly colored nail polish ALSO smells like flowers! This is why I love beauty products. 

Side note, did any of you see American Hustle? My girl Jennifer Lawrence's character went on and on about the smell of her nail polish. I mean, her character was a tad...well...we will say eccentric, but you get the point. She was onto something, and so was Revlon.

I love this product! It looks great on, dries quickly and it really does smell lovely. It also comes at a great price. I am not one to spend much money on nail polish. I truly get frustrated applying it and even more frustrated once I notice a chip (which is usually in the form of a smudge within the first five seconds after I put it on). This incites a whole other level of feelings, that I am sure you have all felt before. Because of my terrible patience and overall nail polish application skills, I usually have my nails done by someone with way more patience and skills. But hey, times get tough sometimes, and nails are always my first luxury to get cut. Now that I found this new polish/perfume, maybe I won't even need a nail salon (for a little while, at least).


How cute is the packaging?

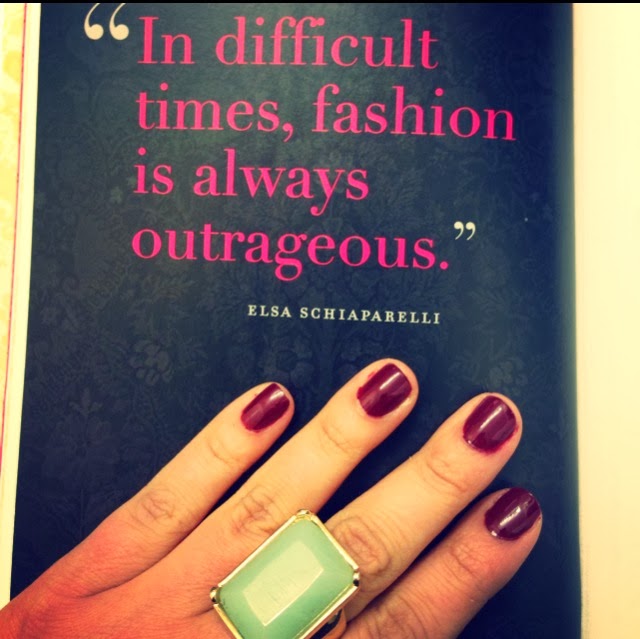
Fits right in with this amazing artwork in The Style Strategy!

Exactly why I love fashion, I mean scented nail polish... outrageous and amazing.

I love how this color compliments my lipstick, also called Bordeaux, by Rimmel.


Like I said, applying nail polish is a headache for some people, including myself. I have collected a few tips from my friends over the years. I hope they help you like they do me!

-Buff nails before applying, a smooth surface looks nicer under the polish.

-If you don't have a base coat, just use a clear polish. Don't skip this step, it makes the finished look smoother and more Polished.

-Try not to apply more than two coats of color, it smudges easier and takes 12284920 years to dry, and who has that kind of time?

-Use a top coat...ALWAYS.

-Dont touch anything for 10 minutes. Even if you think your nails are dry, they aren't. Unless you want to feel a tidal wave of frustration for smudging your nails because you couldn't wait to touch something, just sit still.

-Use a Q-tip or a paintbrush to clean edges once nails are dry.


Nail Polish-Revlon // Lipstick-Rimmel // Ring-The Limited (Similar here) // Watch-The Limited (Similar here)  // Crystal Bracelet-J Crew Factory // Cuff-Straw market in the Bahamas (Similar here)

Thank you for reading, my Polished ladies (and gentlemen)! 

What nail tips do you have up your sleeves? Please share in the comments!

-Courtney

For more product reviews and tips, check out our Instagram pages, Courtney_m_b & Kelseymkipp


Monday, January 13, 2014

Blow it Out

Hello bloggers! 
In my last hair post, Taming Your Mane, I talked about healthy hair-avoiding a daily wash. So, when that time of month week rears it's greasy roots, I know it's time for a wash. This is my routine when I wash and blow dry my hair. One (of the many) reasons I try not to wash my hair daily is because of heat damage. Now, the blow dryer is just something I couldn't give up! Can you say volume? By reducing the use of the blow dryer to 1-2 weeks, it's more manageable. 

Clean hair is "naked". There are no products or dirt protecting the hair. Therefore, before I turn up the heat, I like to protect it using a heat protector. Before the blow dry, I like to spray a bit of the TRESemme heat protector.  

Let's make the blow dryer work for us--with a root booster! {I am not a robot buyer--meaning, when a product I use runs out, I like to take the opportunity to try something different. Instead of buying the same products over and over again, I like to see what else is out there.} Here, I am using Big and Sexy Root Boost--I have also tried, and loved, Aquage. To apply, I part my hair several times around the crown and spray on the foam. Don't forget the back, top and bottom.


Now, use your fingertips and rub it all in. 


Remember, my hair has natural curls. When wet, I need to keep brushing it out to prevent the curls.


Now, that the hair is protected and we are using product to enhance the look-blow it out!


I start with my head upside down. My trusty paddle brush helps prevent the curls and manage the hair.


When my hair is ALMOST dry, I swap the paddle brush for a round brush (the bigger the better-isn't that always the case!?). Typically, I blow it out in sections by clipping the top of my hair up and move from the bottom/back to the front facial area. 


When blow drying remember: tension, tension, tension. By using the brushes, rather than fingers, it creates a smooth blow out that helps minimize frizz and fly-aways. For my curls, it's a must. Also, be mindful of the direction of the blow dryer. Here, you can see I angled it downward (in the direction of hair growth and the stroke of the brush) because I am finishing the blow out. Use the power of the blow dryer to your advantage!


Here are my go-to products. 
Instead of the root boost, I often throw in the 24-hour body moose. Just spray a dollop in your hand and rub into your scalp with your fingertips. I like to experiment with different products, that's how I know what works best for MY hair!

Here is my final product (after my curling iron and teasing brush made their debut).

Thanks for stopping by! Let me know what you think :)

--Kelsey

For more fashion and beauty love follow us on Instagram @KelseyMKipp and @Courtney_m_B